Why We Need to Add Watermark to Video
Adding watermark to video means put text, image or copyright symbols into your videos in order to let others learn more about original author of these great videos.
Nowadays, more and more people like to upload their homemade video/movie on social websites say YouTube to share funny and touching things around them. Sharing is a great idea, but you will never know what will happen to these videos if you put them online without any copyright info. Someone may download and reuse them without your permission. So it is necessary to copyright your video and add your customized watermark on them.
Advantages of Embedding Watermark into Videos:
1, With watermark on video can help to prevent from unauthorized copying and using.
2, Let people know the original author of your awesome videos.
3, A good free way to promote your company/website.
An appropriate video watermarking application will not only be a watermarking program, but also help you to do more additional works. So let’s take a look at what makes a good video watermarking program:
1, Should be a straightforward tool to watermark your video
Good video watermarking program should work well on protecting videos, can add watermark to your video and meet your basic requirements.
2, Should support different video formats.
A video watermarking tool should well support all popular video formats like AVI, MPEG, MP4, WMV, MKV, MOV, etc, which is very important.
3, Must have Powerful functions and professional settings
Help to edit and customize watermarks at your will. A great video watermarking program must have some additional and useful functions like time-line setting, animated watermarks, text effects and special video effects, etc.
4, Easy-to-use and user-friendly
For most of home users, there is no much time to learn how to use it. A friendly and easy-to-use interface could make users get started quickly.
Here Video Watermark Software is recommended, which allows you to embed text, image, logo, sign (include animated one) to your video in batch mode. With its intuitive UI, it becomes very easy finish the task. It is an excellent way to protect and annotate your video. Click picture below to download Video Watermark Software.

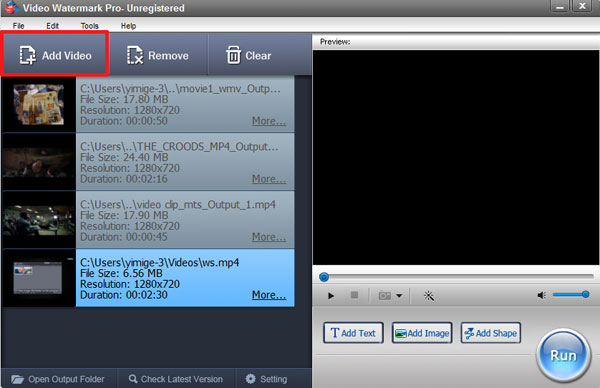
Step 1 Add Videos You Want to Watermark
After successfully install Video Watermark Software, launch it and click “Add Video” to add videos to the list.
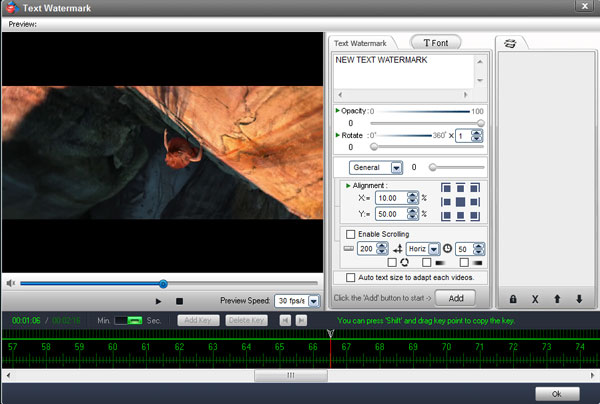
Step 2 Add Text/Image Watermark to Videos
Click “Add Text”/“Add Image” button to go to watermark editing panel. Here we choose to add image watermark.
Click “Add” button to create a new layer, where you can start editing image watermarks.
Click “Browse” button to load watermark from your disc, or select an existing image watermark provided. We have over 150 watermarks, including animated watermark.
Drag the watermark to adjust its position over video.
Change the value of opacity, rotation and arrangement.
After all settings have been done, click “Ok” to return to main interface.
Step 3 (optional) Timeline Settings
You can create many complicated watermarks with timeline editing function.
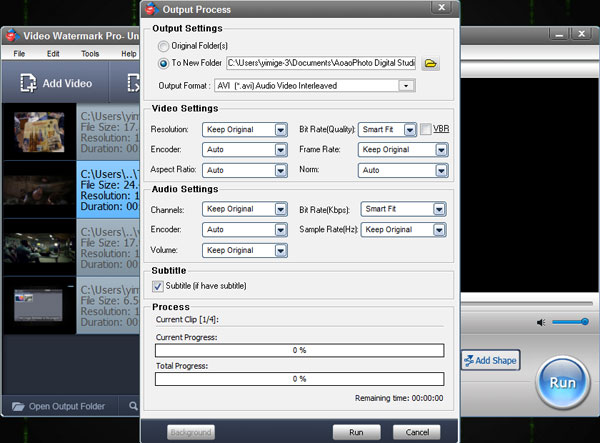
Step 4 Output Settings
On the main interface, click “Run” button to jump to output setting interface.
Here you can select an output folder or keep original folder.
Select an output video format, including AVI, MPEG, MP4, WMV, MKV, MOV, RM, 3GP, FLV, SWF, VCD, and DVD.
Video settings - adjust video quality, video resolution, frame rate, video encoder, etc.
Audio settings – adjust parameters if need.
At last, click “Run” button to start watermarking videos.
Tip: you can click “Background” to make it run in the background.
Have a free trial below: